Showing posts with label Rigging. Show all posts

Sunday, 1 March 2009

Problems

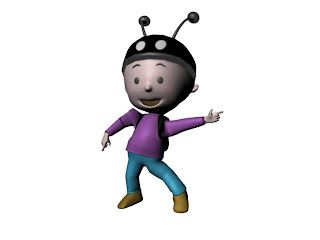
In response to Phils comments about problems with the rig, I set about trying to solve the easiest first. At least I thought It would be easy. Basically he commented about how there's no way to move the whole model in one go, so I created a Master controller which everything would be parented to. Yes everything moves when you move it now, but from the image above you can see the issue thats come up from it. Somehow everything moves completely out of sync, causing the body to deform when I don't want it to. I currently have no idea why.

As for the other problems, Phil mentioned, Im not sure how easy they are going to be to solve. The feet for example, I have already tried for ages to weight them so they bend properly, but they just don't want to bend without tearing horribly.

Tuesday, 24 February 2009

Willie finished!

Today I spent my time trying to work out solutions to those nagging issues presented in the last post. I enlisted the help of both Jaimee Perrin and Dan Dalli for this one.

The green stretch-marks from the bag when the spine deforms held the simplest answer, and that was to simply recolour the affected faces. It stills leaves a noticeable trail of stretched geometery, though Phil assures me this wont matter as the shots will largely avoid angles from the back of the character.

Upon the discovery of the 'keep history' option in the detatch skin menu, I could detatch the skin carefree enabling me to sort out the off-centered hand controller. I also put in some extra edge loops around the knees to help it deform smoother when bending. I found I also had to re-do the reverse foot setup on the right side of the model, as for some reason the geometery was twisting upon movement.

I also learnt that the reason the eyes and eyebrows would not blink or move properly was because I had actually skinned them to the head joint. The solution was to simply detatch them from the bones and parent them to the head controller instead.

There are some things I would like to do for my next rigging attempt, a big one is to sort out the knees. They currently dent inwards when straight, whereas on the rig Phil downloaded for animation practice there is an attribute devoted to straightening out the knees in their extended position. I also want to get the feet working as fluently as they do on that; in mine they stay quite rigid despite the weighting. I also noticed in the channel box on said rig some of those dividers that I had read about early on. I feel these must be quite useful if I am ever to develope a controller with multiple functions for one joint. One more thing about that rig that I want to understand are distance locators. These seem to be useful for an animator who want's precision in distances for smoothly looped motion.

Either way that's it for Willie now, I'm happy with this and I'm ready to pass it on for animation and blast my way through setting up his sister, Pocahontis.

Saturday, 21 February 2009

finished rig

Here he is, fully skinned and rigged and everythings all good!
I havn't posted in a while for a few reasons, mainly that there have been numerous issues while skinning and I have chosen to plough through them without the distraction of blogging it all. However, I will do my best to some up the problems and solutions now.

First off, the initial attempt at painting weights failed because the geometery was all seperate. While this made it far easier to do each section, it also meant that every movement resulted in the limbs coming apart at the seams. The obvious solution to this was to detatch the skin, and combine the mesh. This sorted out that problem to some extent, but I had forgotten to merge the edges and vertices, meaning it still came apart where it had been combined. So I had to go back and combine it again, this time merging the edges/vertices. Unfortunately though, I deleting the history after doing so, which meant the links between the blendshapes and the standard head were lost. So I had to repeat the process from scratch, this time only deleting history on the body.
The next major issue was the bag, as weighting it to all the sections of the spine meant it deformed unreaslistically. The solution to this was to weight it only to the middle and upper spine.
Another problem is with the smooth option. While it seemed necissary to smoth the weights for a lot of joints, such as the spine sections, doing it for everything caused a lot of limbs such as the hands and feet to deform all wrong, and I found I had to re-weight a lot of areas as a result.

It's all done now though, and generally I am very pleased with the result. There are a couple of things I would still like to sort out, but due to time restrictions I am just going to have to pass it on to Phil and start the other character. For example, the left wrist/hand controllers are out of line to the wrist joint. This doesn't effect the practicality of the rig in any way, it's just untidy and annoys me. Also. there is a section of the bag texture that stretches heavily when deformed, causing a massive green patch to appear on his lower back when he bends. Phil assures me that this can be avoided on camera, so I will try not to loose too much sleep over it. The final unsolved issue, and to me the most frustrating, is that the attributes that have been connected to other attributes on the facial rig (the rotation and translation of the eyebrows, and the blink) do not work if the head has been moved from its default position. I will think more on why this could be tomorrow while I still have a chance to sort it out.

Other than that, I'd say I'm happy with it!

Monday, 16 February 2009

Facial control panel

Here it is, my first ever attempt at a facial control interface. It's pretty basic as you can tell, but its still a big step forward from my last rig. The attribute to switch the visibilty on and off is located on the head controller, as highlited in the image. You can see roughly how it works from the playblast; the eyebrows rotate and move up and down with individual sliders for the left, right and mid sections of each; the mouth can be moved from eather side, and in the middle is a slider for the open/close/wide/narrow. I colour coded the curves and locators as appropriate, and also made unnecissary attributes un-keyable. All of the controls are parented to the outer circle, which is in turn parented to the head controller to allow for it to follow the movement of the head. For some reason blendshapes for the eyes would not work, so instead of struggling trying to work out why I simply made some circles in front of the eyes with a blink attribute connected to the scaleY of the geometery, and this works fine.

As I said, it's pretty basic material, but I learnt a heck of a lot through doing this. I learnt how to use the expression editor to connect attributes, and how limit information can effect this. I.e. setting the limit info to -1 to 1 will create a reverse of the blendshape when linked with an expresion. I had a fair bit of difficulty with creating the blendshape sliders without one heavily effecting the other, but I sent out a quick E-mail to Alex and he swiftly helped; it's vital to connect all of the shapes you need to use to the morph target in one go, otherwise maya registers them as seperate targets and will attempt to fill in the difference even when you don't want it to. It's very difficult to explain through words.

Either way I'm glad I'm done with blendshapes for now. I started painting weights as well today, but halfway through I pressed Ctrl Z to undo, and Maya thought this meant i wanted to close the programme without saving. Never mind though, I'll do it tomorrow.

Saturday, 7 February 2009

Antennae problem solved

The problem was very easy to solve. It was a simple case of parenting the curves from the IK spline handles to the head controller. I then parented the antennae controllers to the head controller as well, which means when rotating the head they automatically do the secondary animation- you can see from the clip how it works in a kind of whip like motion. Of course this might not be ideal for posing, but you can still control them manually so it's no problem.

Also, Phil, you wanted to know if they are flexible enough to touch the cap. Straight answer is yes they are.

Thursday, 5 February 2009

nearly rigged!

I got the driven keys set for the fingers, and it's all working fine. Had a bit of trouble with the right thumb, but it was only a simple case of re-orientating the joints before it was working fine. I also included a finger spread attribute. I made sure the joints were large enough to be manipulated manually through the geometery, as set driven keys disables the ability to set up attributes for the individual rotations. Of course with four fingers and a thumb, I wouldn't want to overload the channel box with attributes.

As for the antennae, I set them up with IK splines and one locator at the top to control the curve. I went with one controller as it gives it a more springy effect, rather than several controllers which would make it over-flexible. As you can see from the video however, it means that the antennae stay in a fixed position when they should be following the movements of the head. I need to resolve this, and quickly as we are already way behind schedule.

Wednesday, 4 February 2009

Upper body rig


Almost finished with the rig now. I was contemplating having a go at an fk/ik switch for the arms as it's more reflective of industry practice, but decided against it due to the complexity. It would take up more time than we have, and isn't really necissary; in the industry it is used primarily because some animators like it fk and some animators like it ik- I only have one animator and he's fine with using ik.
The hand controllers work fine, the orientation is not a problem, and they rotate the way they should.
The spine and the head controller took up a fair bit of time though, as I didn't need to go through them in my last rig, so I resorted to the good old Tutorialized tutorial for help. The head controller was insanely complicated, making use of grouping, duplicate groups that are empty, orient constrains, and parenting- all just so when the hip rotates the head stays vertical. I don't fully understand what I did to be perfectly honest, I just followed the tutorial blindly and it worked. I would like to take the time to actually go through it thoroughly and understand how it works. Maybe the rig for the girl will be an opportunity to do this.
No problems with the spine, just a very simple IK spline handle setup, attatching locators to clusters off the curve. I locked off the rotational and scaling channels, as these are useless on a spline IK.
I still need to set up the driven keys for the finger movements, and the spline IKs for the antennae, but other than that this rigs nearly done.

Tuesday, 3 February 2009

Lower body rigged!!

Spent the weekend on the skeleton and the lower body rig. Got the skeleton laid out using the reference curves, which worked a treat. Mirroring the joints however does not seem to mirror the orientation as well, which mainly means the arms may end up controlling differently. Before I do anything with them I want to see if I can sort this out.
I set up the reverse foot using single chain IK solvers, and they are all working, along with the extra attributes for the foot controller. (Heel lean, heel pivot, heel roll, toe roll, toe pivot and ball roll.) I decided as well for this rig I will leave the visibility option for the pole vector controls in the channel box, as making them dissapear on my last rig was unecissarily complicated because I had locked and hidden those attributes. I also got them parented to the hip control so they follow any rotations/movements of the torso.
The next step is to put the IK in the spine.