Friday 13 March 2009
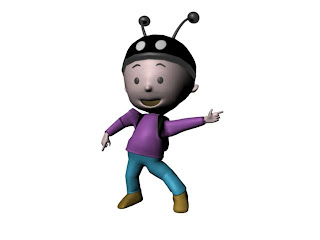
Finished!
Sunday 8 March 2009
2 quick tests
And heres the next one. This is just a quick test after having the idea that maybe if I used the shoulder setup for the spine it could be easier to animate with than the spline handle. (For future projects of course. (The shoulder setup being point constraining a locator to the bone and then parenting it to a handle.))
Let me know what you think!
Wednesday 4 March 2009
PA system and problems resolved
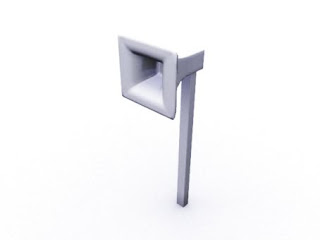
 Heres a quick model of the PA system that will be announcing feeding time at the Gorillas cage or something. I had the idea to do an open/close/wide/narrow blendshape slider for it, so we can get a fun cartoony effect for when the speaker system talks.
I also fixed the problem with the rig mentioned in the last post. Sarah helpfully sent me a suggestion via email which made the inheret transformation attribute apparent. This is the attribute determining wether or not the child of an object follows the parents transformation. I simply had to uncheck this box for a couple of things to stop everything transforming at different rates.
I've had some serious trouble moving the joints in the hips though. They needed to be higher up to begin with. Unfortunately repositioning them would mean detatching the skin and then re-binding, which Maya doesn't want to let me do because theres to much history on the skin. Dan Dalli showed me a very handy tool in the detatch-skin options box that means you can reserve the history, so detatching skin no longer means painting the weights from scratch. Another handy tool I found out about through this is the export weights tool, which means I could in theory remove the history from the skin and then re-import the weights. None of this helped my problem however. Alex thinks it's because I've detatched the skin and painted weights so many times now that the history is such a mess. The only way therefore to do it would be to delete ALL history, which would mean I would have to paint weights again, AND hook up the blendshapes again. Deciding I do not have time to do this, I simply moved the joints up slightly while they were still bound and put a little bit of extra hip influence on the back. It's a tad sloppy but under the pressure of time it's going to have to do.
For similar reasons we have decided to not bother with Pocahontis, as we think it's far more important to devote time to making all this work on one character at least pay off.
Sunday 1 March 2009
Problems
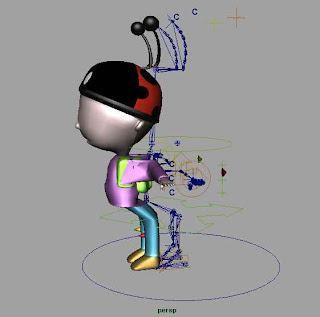
 In response to Phils comments about problems with the rig, I set about trying to solve the easiest first. At least I thought It would be easy. Basically he commented about how there's no way to move the whole model in one go, so I created a Master controller which everything would be parented to. Yes everything moves when you move it now, but from the image above you can see the issue thats come up from it. Somehow everything moves completely out of sync, causing the body to deform when I don't want it to. I currently have no idea why.
As for the other problems, Phil mentioned, Im not sure how easy they are going to be to solve. The feet for example, I have already tried for ages to weight them so they bend properly, but they just don't want to bend without tearing horribly.
Tuesday 24 February 2009
Willie finished!
The green stretch-marks from the bag when the spine deforms held the simplest answer, and that was to simply recolour the affected faces. It stills leaves a noticeable trail of stretched geometery, though Phil assures me this wont matter as the shots will largely avoid angles from the back of the character.
Upon the discovery of the 'keep history' option in the detatch skin menu, I could detatch the skin carefree enabling me to sort out the off-centered hand controller. I also put in some extra edge loops around the knees to help it deform smoother when bending. I found I also had to re-do the reverse foot setup on the right side of the model, as for some reason the geometery was twisting upon movement.
I also learnt that the reason the eyes and eyebrows would not blink or move properly was because I had actually skinned them to the head joint. The solution was to simply detatch them from the bones and parent them to the head controller instead.
There are some things I would like to do for my next rigging attempt, a big one is to sort out the knees. They currently dent inwards when straight, whereas on the rig Phil downloaded for animation practice there is an attribute devoted to straightening out the knees in their extended position. I also want to get the feet working as fluently as they do on that; in mine they stay quite rigid despite the weighting. I also noticed in the channel box on said rig some of those dividers that I had read about early on. I feel these must be quite useful if I am ever to develope a controller with multiple functions for one joint. One more thing about that rig that I want to understand are distance locators. These seem to be useful for an animator who want's precision in distances for smoothly looped motion.
Either way that's it for Willie now, I'm happy with this and I'm ready to pass it on for animation and blast my way through setting up his sister, Pocahontis.
Saturday 21 February 2009
finished rig
 Here he is, fully skinned and rigged and everythings all good!
I havn't posted in a while for a few reasons, mainly that there have been numerous issues while skinning and I have chosen to plough through them without the distraction of blogging it all. However, I will do my best to some up the problems and solutions now.
First off, the initial attempt at painting weights failed because the geometery was all seperate. While this made it far easier to do each section, it also meant that every movement resulted in the limbs coming apart at the seams. The obvious solution to this was to detatch the skin, and combine the mesh. This sorted out that problem to some extent, but I had forgotten to merge the edges and vertices, meaning it still came apart where it had been combined. So I had to go back and combine it again, this time merging the edges/vertices. Unfortunately though, I deleting the history after doing so, which meant the links between the blendshapes and the standard head were lost. So I had to repeat the process from scratch, this time only deleting history on the body.
The next major issue was the bag, as weighting it to all the sections of the spine meant it deformed unreaslistically. The solution to this was to weight it only to the middle and upper spine.
Another problem is with the smooth option. While it seemed necissary to smoth the weights for a lot of joints, such as the spine sections, doing it for everything caused a lot of limbs such as the hands and feet to deform all wrong, and I found I had to re-weight a lot of areas as a result.
It's all done now though, and generally I am very pleased with the result. There are a couple of things I would still like to sort out, but due to time restrictions I am just going to have to pass it on to Phil and start the other character. For example, the left wrist/hand controllers are out of line to the wrist joint. This doesn't effect the practicality of the rig in any way, it's just untidy and annoys me. Also. there is a section of the bag texture that stretches heavily when deformed, causing a massive green patch to appear on his lower back when he bends. Phil assures me that this can be avoided on camera, so I will try not to loose too much sleep over it. The final unsolved issue, and to me the most frustrating, is that the attributes that have been connected to other attributes on the facial rig (the rotation and translation of the eyebrows, and the blink) do not work if the head has been moved from its default position. I will think more on why this could be tomorrow while I still have a chance to sort it out.
Other than that, I'd say I'm happy with it!
Monday 16 February 2009
Facial control panel
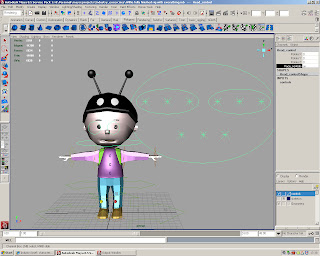
 Here it is, my first ever attempt at a facial control interface. It's pretty basic as you can tell, but its still a big step forward from my last rig. The attribute to switch the visibilty on and off is located on the head controller, as highlited in the image. You can see roughly how it works from the playblast; the eyebrows rotate and move up and down with individual sliders for the left, right and mid sections of each; the mouth can be moved from eather side, and in the middle is a slider for the open/close/wide/narrow. I colour coded the curves and locators as appropriate, and also made unnecissary attributes un-keyable. All of the controls are parented to the outer circle, which is in turn parented to the head controller to allow for it to follow the movement of the head. For some reason blendshapes for the eyes would not work, so instead of struggling trying to work out why I simply made some circles in front of the eyes with a blink attribute connected to the scaleY of the geometery, and this works fine.
As I said, it's pretty basic material, but I learnt a heck of a lot through doing this. I learnt how to use the expression editor to connect attributes, and how limit information can effect this. I.e. setting the limit info to -1 to 1 will create a reverse of the blendshape when linked with an expresion. I had a fair bit of difficulty with creating the blendshape sliders without one heavily effecting the other, but I sent out a quick E-mail to Alex and he swiftly helped; it's vital to connect all of the shapes you need to use to the morph target in one go, otherwise maya registers them as seperate targets and will attempt to fill in the difference even when you don't want it to. It's very difficult to explain through words.
Either way I'm glad I'm done with blendshapes for now. I started painting weights as well today, but halfway through I pressed Ctrl Z to undo, and Maya thought this meant i wanted to close the programme without saving. Never mind though, I'll do it tomorrow.